Thursday 19 April 2012

Canadian Laguna Spring Tour

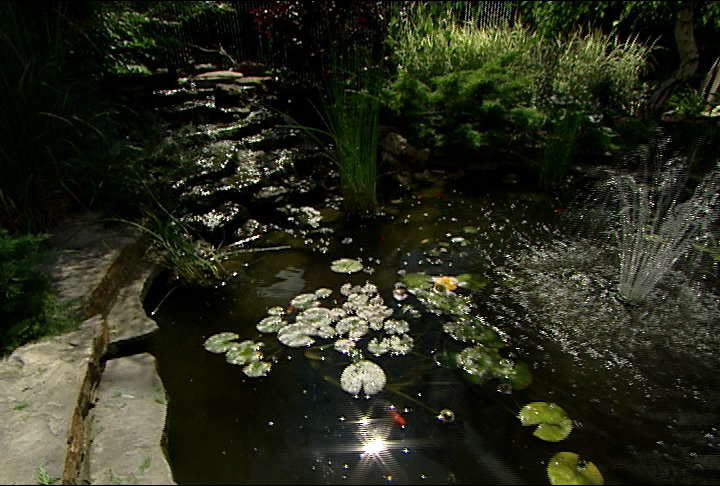
Laguna Spring Series

We are excited to be bringing our tour north of the border! See our tour dates and locations below.


April

04/21: Embrun, OC, Co-op Embrun Rona, (Seminar Starts: 11am, Meet the Laguna Pond Specialist)
04/19: Chateauguay, QC, Animalerie Felix (Seminar starts: 4pm-6pm Topic: opening a pond+starting a pond)
04/21: Chateauguay, QC, Animalerie Felix, (Seminar starts: 9am, Topic: opening a pond and starting a pond)
04/28: Drummondville, QC, Pepiniere Henner-(discounts available, Topic: opening and building a pond)
04/ 29: L'assomption, QC, Pep. Villeneuve Porte ouvertes, (9am ,Topic opening and building a pond)

May/June

05/5: Chambly QC- Ferme Guyon (Seminar starts: 9am, Topic :pond opening and information event)
05/5: Burlington ON- Holland Park Garden Gallery (Opening seminar at 11am, Meet Laguna Pond Specialist)
05/6: Pierrefonds Montreal,QC-West Island Nursery (8am -11am Topic: Pond opening and information event)
05/6: Sainte Catherine, QC, Titi et Gros Minet (1pm-3pm Building and maintenance of a pond)
05/10: Mississauga, ON, Sids Ponds and Gardenscapes (7pm, Meet the Laguna Pond Specialist - Pond Opening and algae control seminar)
05/12: - Trois Rivieres, QC, Jardin du coin event (9am Topics: Laguna products and opening a pond)
05/26: -St Paul, QC,  Pepiniere ST PAUL, (9AM Topic: Pond building, maintenance, information session).
05/26: St. Paul, On, Klomps Plantscapes (10 am Topic: Combined seminar - Pond Opening and algae control seminar & Pond planting and maintenance with Moores Water Gardens)

05/26 - Trois Rivieres, QC, Jardin du coin  (9am,  Seminar on Laguna products and opening a pond)
06/2: Peterborough,ON, Peterborough Landscape Supply (10am-2pm,Topic: Meet the Laguna Pond Specialist day)

Wednesday 4 April 2012

6 Easy Steps for Opening Your Pond

Spring… it’s time to clean that pond!  Here are 6 easy steps for opening your pond.


Step 1: Clean Up


The first thing you’ll need to do is clean up the mess left over during the course of the previous fall and winter.

Use a pond net, skimmer or pruning tool to remove leaves, twigs and debris in, around, and at the bottom of pond. Use your pond vacuum to suck up dirt and plant matter from the base of the pond.  Ideally, choose a cordless vacuum to allow you to move freely around your pond.  Look for one with chopping blades to help speed things up. Make sure your thermometer is working properly, if it isn’t, install a new one.


Step 2: Refill your Pond


Early spring is a good time to consider a partial water change, depending on the pond’s condition (and what was done in the fall). Winter run-off may contain pollutants that may have seeped into the pond.
Use a pump to partially drain the pond. Before refilling the pond, let the water run a few minutes to flush the pipes. After replenishing the water, add a pond water neutralizer to eliminate chlorine and chloramine as well as to neutralize harmful metals.


Step 3: Clean & Start the Equipment


Pond equipment should have been cleaned and packed away for winter. If it wasn’t, make sure that you clean them thoroughly before restarting.
Take your filter apart and thoroughly rinse all media in a bucket of water (pond water taken from the pond - never use tap water as the chlorine will kill off the beneficial bacteria that keep your pond water in biological balance).  Replace filter foams if required before reinstalling your filtration systems.
If pumps were in operation over the winter, remove and clean them. Reassemble any hoses and other water runs and inspect for damage. Repair and replace as required, then test to ensure that everything works.
 If you have a waterfall, use waterfall foam to fill in gaps and openings in waterfall area.
If you have a UV sterilizer or if your filter contains a UV-C lamp, early spring is a good time to replace the bulb as its effectiveness dramatically reduces after 12 months.
 When the water temperature remains above 7ºC / 45ºF, start the filter and the UV clarifier to maintain clear water.
To help achieve optimum water conditions, add in barley straw and peat granules to the filters biochamber or directly into the pond (using a mesh bag to contain the product).

Step 4: Adding Fish


Fish that have been kept indoors for the winter will need time to adjust to the pond’s environment. A sudden change in temperature and pH level can harm them. Ensure that the water temperature is a minimum 15°C /60°F before relocating the fish back into the pond. Allow them to acclimatize gradually. Never pour or drop them into the pond. Gently net and place them in a plastic bag for transportation.
If you have purchased new fish, put the bag in the pond and let it float untied on the water surface. Wait about 10 minutes or until the temperature of the bag and the water are about equal, then untie the bag and add a small amount of pond water to the bag and leave for another 10 minutes.
Repeat the process once or twice more, then add ½ a cap of pond water neutralizer before gently allowing the fish to swim out of the bag and into the pond.
Moving can be traumatic on fish, so watch them carefully to ensure that they’re adjusting to their new surroundings and that there are no losses. Also check ammonia and nitrite readings regularly, using a pond test kit, to ensure that the biological filter is establishingrapidly and effectively.
Fish should be fed only when the water temperature is consistently above 8°C/50º F. Once above 8°C/47ºF, begin feeding a spring/fall formula food enriched with wheat germ, it is low in protein, easier to digest, and helps minimize waste. When the water temperature stays above 10ºC/50º F, switch to an all season formula. Feed amounts that fish can eat within a few minutes and remove any uneaten food.

Step 5: Planting

Prepare a spot where you can set up everything you will need (soil, pea gravel, pruners, planting baskets or tubs, fertilizing spikes and pond plant fertilizer).  This location should be close to the pond in order to facilitate planting them into the pond.
To pot pond water plants, simply trim any damaged or dead parts and then partially fill the tub, planting basket or bag with soil (container will vary depending on plant type), center the plant and finish filling with soil – take care to leave enough room at the top to add a top layer of pea gravel. 
You can soak plant roots in a fertilizer solution prior to planting increasing their growth and flower blooms significantly (always read fertilizing directions carefully to avoid damaging the roots) or use fertilizer feeding sticks to ensure a well-balanced “diet” all season long.
Add new plants as the weather becomes appropriate for each plant.  Floaters should be added once the danger of frost has past (late spring). 
The plants can be placed back into the pond during the filling process. 


Step 6: Treat Pond Water


The best time to start the pond’s biological system is at the beginning of the season when the water temperature is above 10°C/50° F.
Add a dose of biological supplements to replenish essential biological colonies and eliminate harmful ammonia and nitrites.  Removing excess phosphates after the long winter will help restore and maintain the natural balance of pond water, resulting in clear pond water.

Now sit back and enjoy your sparkling pond!